Showing posts with label Summer School Art. Show all posts

Summer School Art Kid's Edition:: Jesus Window Poster

Friday, June 19, 2009


In Adventures In My Father's World, our main curriculum for Belle, we are studying the names of God. This week we are celebrating the name that means The Lord Saves: JESUS!

Such a simple, but fun way to spend these days when it's too hot to play outside for very long.

I had Belle draw and cut out the letters, and peel the crayon wrappers...she has a real talent for peeling crayons and garlic. Bless her.


I used my vegetable peeler to shave the crayons, which was so beautiful that it felt theraputic despite that fact that I could hear the boys getting into bathroom trouble. I just loved the colors and the shapes the shavings were making...maybe I need to get out more...see some sunsets or something...

We then ironed the letters and shavings between two pieces of wax paper on a low heat.

What we learned:: Wax paper + low heat = cool stuff.

Remember making stenciled shirts with it? ahh, good times...still waiting for that phone call, by the way...Tuesday was the 6 month mark since we've been officially waiting...sigh...


See more Frugal Fridays at Life as Mom
See more Kid Friendly Fridays at I Blame My Mother

{Summer School Art :: Winnas!!!}

Sunday, June 14, 2009

(That's me hollering, "Winners" in my best *with-it-girl* voice)

Summer School Art at PAJAMA MAMA


THANK YOU to all who participated (and humored me) last week. I had fun and hope you did, too.

As I prepared for Summer School Art, I was thrilled to offer these little gifts to you in a giveaway. But my main mission was to reveal a few of the many ways in which we can express our creativity. We could continue this all summer and fall and winter, but I would need you to take over quickly!

Ephesians 4:7 "...he has given each one of us a special gift through the generosity of Christ."

We have each been given different gifts and it is thrilling to see how God can use them!

Okay, without any further gabbing, let me give two friends a few gifts. The winners are:

Giveaway #1, Apron & Towel Set : Buildeth Her House, mom of seven and fellow blogger who is starting Feminine Friday, an extension of the Feelin' Feminine Challenge. I also noticed she has a Buildeth Her House button with aprons on it...hope she likes her prize!

Giveaway #2, Inspiration Book of Her Choice: Leaning on Him. Amanda also wins the perfect attendance award-make sure to check out all her posts on what she created last week...her home portrait is Beautiful, she tweaked the project and made it her own, and now I need to try a project like it soon!

{Summer School Art :: Your Turn}

Thursday, June 11, 2009

Summer School Art at PAJAMA MAMA


Okay, I'm a lee-tle bit nervous Mr. Linky won't show up, but I'm so glad you did. You have no idea how much I'm looking forward to checking out your creativity!

Just some business…

::Your link can be anything that displays creativity... a beautiful meal, a poem, a sewing tutorial, a framed drawing by a special 4 year old...

::And it doesn't have to be a new post, although, I would be honored if you would link back to Pajama Mama.

::If Mr. Linky isn't here, just leave a comment with your permalink so we can find you!


And now, if I may give one last assignment (after linking up, of course):

I want to know what books you've used in finding inspiration. From an Amy Butler sewing book to the Pottery Barn catalog-leave a comment and tell us inspires you. Remember, each comment = an entry to Giveaway #1!


Summer School Art Participants
1. Amanda @ LOH (Beaded postcard)
2. Amanda @ LOH (House portrait)
3. Amanda @ LOH (bird paintings)
4. Amanda @ LOH (Painted pot)
5. Christina (Beaded Card)
6. Sarah Mae (Bird picture)
7. Joye @ The Joyeful Journey
8. Simply Dawn (watercolor)
9. Simply Dawn (beaded card)
10. Here I am (beaded card)
11. Abigail (Recipe Scrapbook!)

Powered by... Mister Linky's Magical Widgets.

{Summer School Art: Painting the Birds}

All you Summer School Art people are so cool! I've loved getting links to your creativity and seeing the tweaks you've made to add your touch to them. Can't wait to see more if Mr. Linky will join us! Okay, today's lesson is for the birds...I mean bird-lovers, which seems to be every mommy-blogger out there, no?


These prints are from Pottery Barn, and no longer available-but have no fear-we can make our own!

Okay, got your supplies? Want to try a spotted woodpecker?

Here we go...start with a pencil outline. If you want to trace a photo or picture (or this one), trace away.


I used my kids' black paint to paint a thick outline of the body, head, back and tail. Use thinner strokes for the legs and feet-are they feet? claws? talons? whatever...


Next, add a little bit of water to some of your black paint. Paint a watery line on the tummy. This is also when you can add white spots on the tail. I used the eraser of a pencil to make the small circles, but a little paint on the tip of your pinky will work, too. Test on a separate paper first, till you find the effect you want. Then set it aside and wait for it to dry a bit.


All dry? Okay, grab your kids' sidewalk chalk and fill in the body. Have oil pastels or chalk pastels? Even better. Use what you have. And smudge with your fingers. Add markings on the back and wing, too. Use a coral color for the body, and a red shade for the head and underbelly.


Tip: To keep your finished chalk masterpieces (or your kids') smudge proof, spray with Aqua Net, or your brand of hairspray-it dries fast and clear and allows you to stack and store-or frame.


Want to try another? How about a Pheasant? Don't you just love Pheasant feathers? Me too. Okay, I'm switching paints here...now I'm pulling out my watercolors...don't have any? Remember from yesterday's lesson, I used my kids' watercolors.


Again, trace or freehand a bird you like. Now paint the entire body in a watery brown water color. Add less water to the brown you'll use on the head, tail, tummy and legs.


Don't worry about letting it dry before you add black and brown dots. Darken the head, beak and neck with more the same paint you used for the dots.


Mix just a smidgen of red water color. You won't need much at all. Add a touch around the eye. Now, with a black felt-tip pen, outline the body, legs and beak. Use the pen to add feathers and define the tail. When it's dry- you're done!


Frame in gilt frames, and you've got a PB-worthy wall! Take a pic, and link up tomorrow! (You all know I mean Pottery Barn-worthy wall, not Peanut Butter-worthy wall, right? oh good. I knew you guys were quick!)

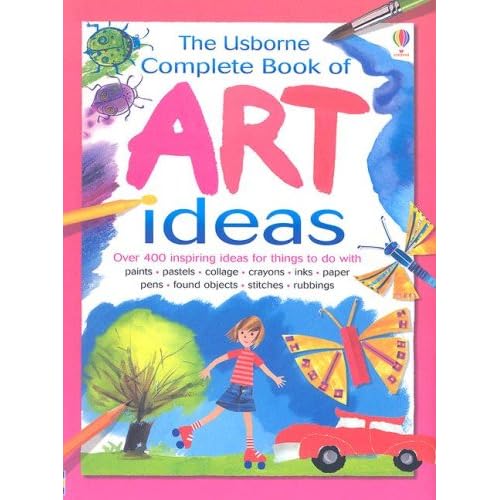
Want more techniques for feather painting? Start with this book:

The Usborne Complete Book of Art Ideas

Now tomorrow YOU are the leader! Get ready to link up for projects and invite us over to be inspired!

Subscribe here or follow now to make sure you don't miss the inspiration!

{Summer School Art :: Home Portrait}

Wednesday, June 10, 2009


Anyone see The Nester's colored pencil rendition of her beloved house? I saw it and had to have one of my own. Today, together, we'll make one of your home.

Get out your supplies:
-a printed picture of your home
-heavy paper, card stock, watercolor paper, etc.
-pencil
-watercolors & brushes OR colored pencils OR fine tip pen
-painters tape may help, too

You may need to take your camera outside and take a quick photo of your house. Make sure the car's not in the driveway. The weather is not that important, this will just give us the basic shape. Upload your picture to your computer, determine the size you want your picture to be and print out a black and white or grey-scale copy. A photo may work, too, but you have less control over the size you want your picture to be.

Here I have printed out a picture of our home and taped it to the door where lots of light comes through. Painters tape is great because it will not harm your paper and it also can ensure a clean border around your picture. Take your heavy paper and place it over the print-out. Use the light to trace the basic outline of your home, shrubbery, trees and anything else you want in your art piece.

Step three: Color in the lines. Use watercolor, or pencils to add color, or leave as a sketch, if that is the look you are happy with. You may also try using a fine tip black pen over the pencil and erasing any seen lines when the ink has dried. In my example, I outlined my painting with a black pen after my watercolors were dry.

It's too easy-peesy, right? But wouldn't you love a framed hand-drawn picture of the place your family calls home? Wouldn't someone you love? Or a neighbor? See a gift idea?

Want to hear how cheap this project was? I didn't have my own set of watercolors when I did this picture (I've since bought my own when they were 50% off at HobLob). So this picture was actually done with a set of children's watercolors that comes attached to a coloring book. I may have used a real brush...not sure.

Okay, class is almost dismissed before you discredit me for exposing all my secrets for cheating at art. Just a reminder-get your supplies ready for tomorrow! And get your creativity ready for Giveaway #2. Link up with Mr. Linky here THIS FRIDAY with your post on any of the Summer School Art projects, or one of your own!

Don't miss tomorrow's class, subscribe here!

{Summer School Art :: Hooked Towel}

Tuesday, June 9, 2009

Welcome to Day 2 of Summer School Art!

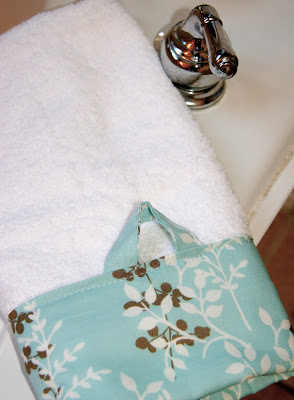
Today's a sewing lesson...but please don't leave if the "s" word scares you. This is a very simple project with a stunning impact! (and, if for no other reason, stick around for the GIVEAWAY!!!) I'll be making a kitchen hand towel, but this could be for a bath towel just as easily.


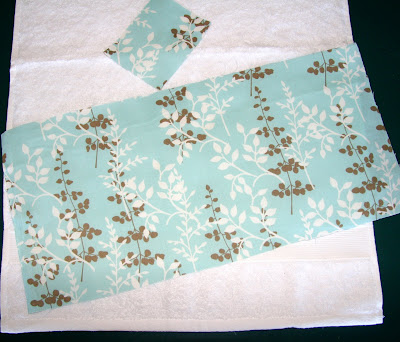
Today you'll need a towel, either hand or bath size, and a fourth yard (for hand towel) or half yard (for bath towel), coordinating fabric. You'll also need coordinating thread, a ruler or yardstick, scissors, pins and an iron.

Let's begin. Baby steps.

Step 1, Determine the size band you'll need. Measure the width of your towel, then add 1 inch to this measurement for seams. If you're making a hand towel, cut your band 8" wide x the length you just measured (with 1 inch seam allowance). If you're making a bath towel, cut your band 15 1/2" wide x your measured length. Set the band aside.


Step 2, Cut fabric for the hook or loop. For the hand towel cut a piece, 3" wide x 4" long. For the bath, 3 1/2" wide x 6" long.

Step 3, Make towel loop. First, fold the panel in half, length wise and press (iron). Open back up and fold the ends in and press.


Fold up to enclose raw edges and sew down both sides.


Step 4, Press both the top and bottom of the towel band length.


Step 5, Attach loop to towel band. Unfold the top band for the moment. Find the center of your towel band, and pin loop to the RIGHT side of fabric equal distances from the center. Machine baste the loop ends to secure them.


Step 6, Fold back the towel band ends that we had pressed. Fold the band in half and press. Wrap the towel in the towel bands and pin into place. Pin on both sides, and make sure where you plan to sew will catch both sides.


Step 7, Leave the ends open, and begin to stitch in a few stitches from the ends to leave room to tuck the ends in later. Sew band to towel.


Step 8, Sew ends in. Tuck and pin the ends in, then stitch along the edge.


Was that too bad? If so, it was probably from my lack of experience in giving written sewing instructions-so please let me know if and where I've inserted any unnecessary confusion.

Sewing Books I love:

Amy Karol's Bend the Rules Sewing. I've posted about some of the books projects here. And her blog, Angry Chicken is in my blogroll!

Anne Marie Horner's Seams to Me.

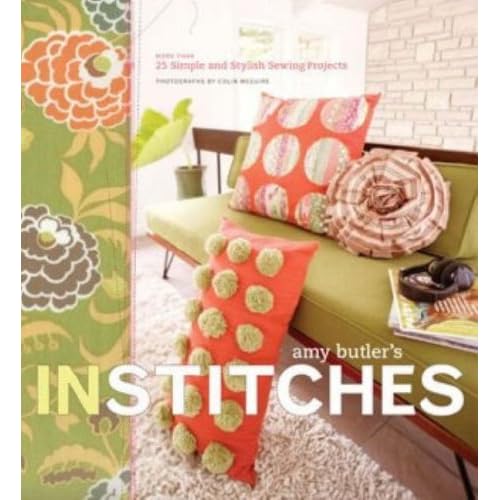
Amy Butler's In Stitches, where there are more detailed hooked towel instructions.

All of these books are for the beginner to the advanced. They each give definitions and tips galore!

Want to win one of those books? Then get your creativity ready for Giveaway #2. Link up with Mr. Linky here THIS FRIDAY with your post on any of the Summer School Art projects, or one of your own! One linker will win their choice of my Summer School Art recommended books to inspire you in more creativity!

And don't forget to enter to win this, too:


Are you following or subscribing? Click here
to stay in school!

{Summer School Art :: Beaded Postcard}

Monday, June 8, 2009


Are you ready to dig in to our first summer art project? Do you have all your supplies?

Today we'll need:
-cardstock, if letter size, cut into fourths
-bugle beads
-thread
-fine needle that will pass through your beads


With your needle, poke holes around the border of your first postcard. I said "first postcard" because after seeing your finished card, you'll have to make the other three! I poked holes in this pattern:


Begin threading your beads through your postcard pattern. Then get mindless...watch tv, listen to a message, talk to your hubby and before you know it, you'll have a beautiful card any friend would love receiving in the mail.


A tip for those of you who decide to make more:
Cut up an old sock to make a glove to hold beads you'll be using. I've used a child sock and packing tape here (by the way, it's really hard to take a picture of your own hands!):


Like this idea? Look for this book for more beading ideas and postcard patterns:

Alabama Stitch Book by Natalie Chanin-there's even a postcard flickr group...I should add this one, no?

Want an even cheaper twist? Just thread your pattern sans beads. The pattern above makes a vine looking stitch that with a contrasting color is very beautiful!

Summer School Art at PAJAMA MAMA

Okay, get beading (or stitching)! And don't forget to get tomorrow's supplies together and meet back here, same time, same place!

Class dismissed, unless you're just joining us today-then check out the Summer School Art Giveaways!

{Summer School Art :: The Giveaways}

Thursday, June 4, 2009

Summer School Art at PAJAMA MAMA

Did I say there'd be TWO GIVEAWAYS?


YES!!!!

GIVEAWAY #1 is....drumroll, please...


This Apron made by 'lil ol' me....AND Tuesday's Summer School Art Project.


with Tuesday's Project:


So, how do you enter for a chance to win the loot? There are lot's of ways! You can do one, or all!

*Put the Summer School Art button on your blog (get the code in the sidebar)

*Promote Summer School Art with a post, tweet, facebook message, email, etc.

*Follow or subscribe to Pajama Mama -you'll want to stay tuned for more art projects throughout the summer. If you already follow or subscribe- just let me know!

*Comment on each post during Summer School Art Series.


The more you do, the more entries you will have. Make sure to leave a separate comment for each thing you do. Comments on this post count as well towards the entries. Prize winners will be announced on Monday June 15th.


Okay, I said TWO giveaways, right?

GIVEAWAY #2 is your choice of one book recommended in Summer School Art. At the end of each tutorial, I'll recommend the books I LOVE on the type of craft or project done in the post. If you win this giveaway, you choose one of those awesome books.


Want a glimpse into some of the books?

Amy Butler's In Stitches is so project-inspiring. She goes step-by-step and includes sewing patterns and tips!


Wish you could go back to high school art class some days?
You will LOVE The Usborne Complete Book of Art Ideas!
I love step-by-steps!


One of this weeks projects comes from The Alabama Stitch Book. Look: More patterns and steps!


How do you enter giveaway #2?


Link up to Friday's Linky Party
with your post about one of the featured Summer School Art projects, or your own project or tutorial! Please link up! Everyone loves a party-and a crafty party's even better!!!!

Both Contests will close Saturday, June 13th at midnight. Giveaways will be randomly selected and announced Monday, June 15th!

Subscribe here
so you won't miss any of the fun!